


The Fan Fold


Some projects seem straight forward and simple at first
glance. These are full of opportunities to concentrate on
the details.
I’ve been known to spend hours making decisions, laying
out color patterns and applying dye to one shirt. This is
when I move from a practice to really living in the moment.


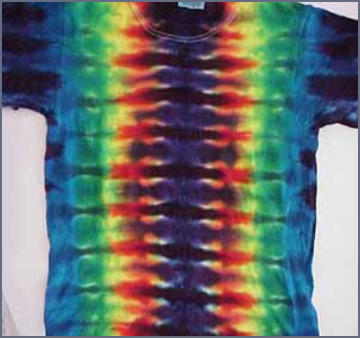
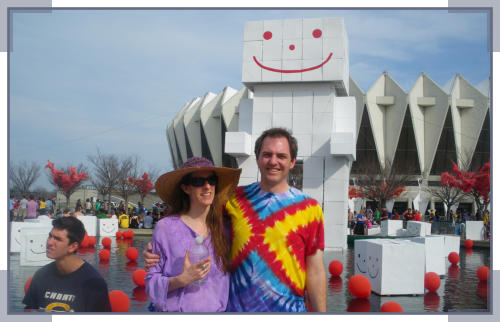
The Fan Fold is a simple pattern that anyone can do and get excellent results. The picture on the left is the final
product. New pictures to be posted in July, 2013.
What you cannot see in these pictures is the first step. Sorry, I was in a hurry to get a large set of these done
(22) and my picture taking was rather lax. The first step (which is not required) is to fold the shirt in half, length-
wise. By this I mean align the sleeves with the crease running from the neck to the middle of the bottom of the
shirt. You can certainly play with the alignment by folding diagonally or horizontally if you desire, but for this
run, we'll just do length wise. You can tell by the completed shirt that the pattern is actually mirrored from left to
right, or right to left depending on your preference, by noticing that the width of the vertical bands of each color
are the same on either side of the shirt.
I ALWAYS try to fold so that the front of the shirt is on the inside and the back of the shirt is on the outside. This
will make more sense later, but for now, let's just accept that whatever is on the inside is usually the "better"
pattern. By folding in half, we've taken two layers and made four. When the dye is soaking in, adjacent layers
well match each other more closely than those separated by two or three layers because the dye will penetrate
each layer a little less. This is why I put the front of the shirt on the inside.
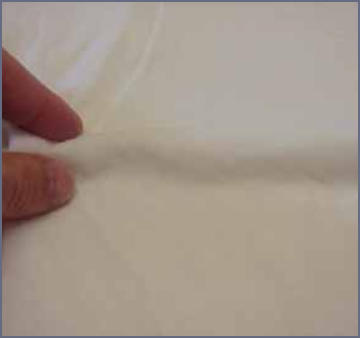
I try to start folding this pattern in the middle, because there is less room for error with a shorter series of folds.
If you start at the top or bottom, there is much more space to cover and the slightest irregularity begins to
magnify itself with each consecutive fold. As you can see, I pinch a single pleat, usually at the base of the
sleeve, trying to make sure that the pleat is perpendicular to the shirt. This assures that the horizontal lines will
be horizontal all the way across. A "mis"aligned pleat will result in a slight V, either up or down, depending on
how you fold it. (Some of you have already caught on -- creating a pleat from the shoulder to the middle of the
shirt is how the V pattern is created!) For this shirt, my fold was about an inch (2.5cm) high.
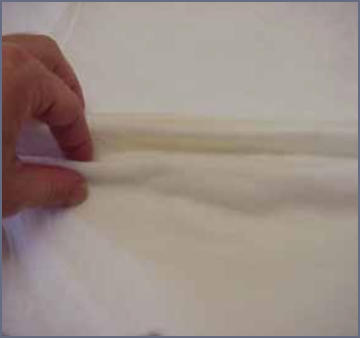
You can't see my right hand (it was holding the camera) but it would be pinching the same pleat on the right
side. Here you can see that I am attempting to smooth out the pleat so that it is a uniform height all the way
across the shirt.
Using my middle finger to hold the first pleat in place and act as a mental (physical) anchor, I use my first finger
and thumb to pinch the second pleat. This "three finger" technique helps me keep the pleats spaced evenly and
becomes quite natural after a couple of tries. Keep each consecutive pleat of uniform size. I try to smooth
things out by pulling just the slightest bit at each end. Don't pull too hard, your ends will get all out of alignment
and your shirt will stretch causing irregularities in the final pattern. It's okay if the right side (the side without the
sleeve) is a little out of alignment, but if it's considerable, it may be worth starting over.
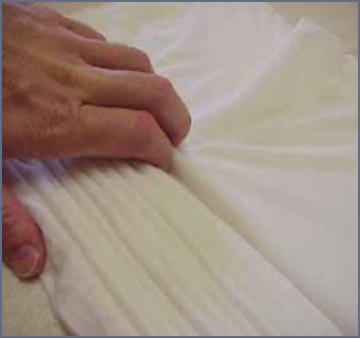
Once I've folded (pleated) all the way to the bottom, I go back to the middle and work my way up to the top. It
may seem like you've messed up when you realize that the pleats don't necessarily go straight across the
sleeves, but don't worry! When was the last time you walked around all day with your arms sticking straight
out?!? This is fine and you won't even notice it was like that when you're done! Also, you may notice that
sleeves are not cut square. The pleats may or may not line up across them, but it's okay, so long as they are
evenly spaced and all about the same height. Notice that I've squeezed the pleats together. It's easier to see
how they all match up this way.
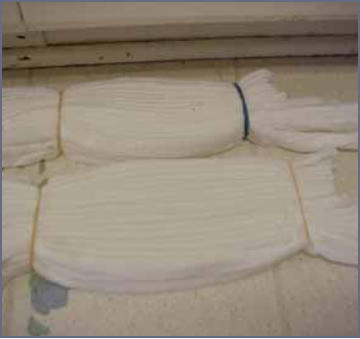
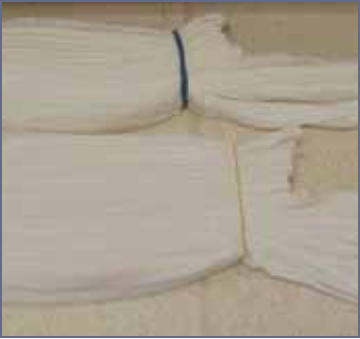
I put two rubber bands around the shirt, one at each end, just to hold things together. Remember, tie dye is a
method of resistance. If you place the bands on tightly, less dye will penetrate where the bands are, resulting in
white patterns. This may or may not be the result you are seeking, so make your own judgment call on what is
too tight. For these shirts, I used medium sized rubber bands and did not double them. You may have noticed, I
rotated the shirts 180 degrees, so now the sleeve is on the right and the middle of the shirt is on the left.
I don't know which image better shows it, this or the one above, so you get both. Notice on the left side (the
middle) that most of the edge is aligned. I'm not quite sure why the neck area (at the bottom in this view) sticks
out a little. You can see though, that in the final product, the bands of color are a little wider in the middle at the
bottom of the shirt. This indicates that A) the final product pictured is not one of the shirts pictured being folded
and B)what happens when the middle edge is out of alignment. The final product pictured obviously stuck out a
little at the bottom and not quite as far at the top. Notice how the bands of red have slight deviations.
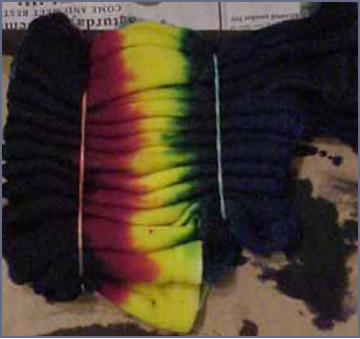
Here, you can see how the dye was applied. You may notice this shirt looks much smaller than the others
pictured. It is; this is one of the kids shirts!
1.
I started in the middle, adding yellow first - I find it is better to add the lighter colors first. I added a wider
band of yellow than I intended to see in the final product because I wanted to allow for overlap and
blending. When you place blue or red over yellow, you get green and orange. I allowed extra yellow
because I wanted orange and green. If you start with the dark colors, the pores in the material get filled
up with the dark and it takes much more light dye to get a blend.
2.
Then I added the red, to the left of the yellow with a little overlap to make orange.
3.
Next I added purple, again with a little overlap. Remember this shirt has been folded in half, so whatever
color you put along the crease will be the center of the pattern on the shirt. IMPORTANT: Because this is
folded in half, whatever color you put along the crease will be TWICE as wide when it unfolds. Don't be
surprised if you apply evenly spaced equally wide bands of color and then open the shirt to find the
middle band is twice as wide as the surrounding bands.
4.
Going back to the yellow, now on the right side, I added blue with a little overlap to create the green you
see in the final product.
5.
Finally, I added more purple to this end, because I like purple and it made sense to me to have the final
pattern start and end with purple.
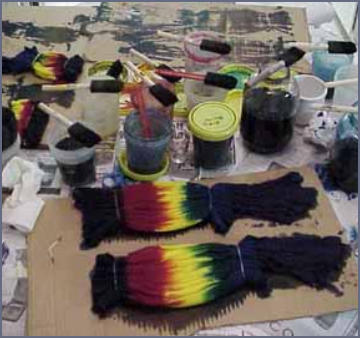
I wanted these shirts to be colored almost completely (my mom thinks too much white doesn't look as good) so
they are pretty well saturated as you can see by the run off on the edges. Not TOO saturated - we're not talking
dye dripping everywhere, but when I separated the pleats to look inside, the color from the top mostly touched
the color from the bottom. Here I guess I should mention, in case you haven't read it yet, that more complete
instructions about dye application and the like are available at my Start to Finish Guide to your first Spiral Tie
dye, located at the spiral tab at the top of the page. You may have guessed or noticed I skipped right through
the part about flipping my shirt over and repeating the dye application process with the same or similar colors.
Here's a better picture of the mess you can make when you're doing mass production.
After much waiting (16 hours), rinsing, wringing and a final run through the wash, here's what (one of) mine
looks like. I'm sure yours will be AWESOME!


The basic Fan Fold